How to…
Test Fitting
Adjusting the Size
Adjusting the Strength
Bladeflex may not come adjusted to your exact size that you require for your current level of posture. You may need to adjust the size of Bladeflex (as described below) or also adjust the strength. Bladeflex is pre-adjusted at the lowest resistance setting and this can increase as you improve as well. Finding the right size and strength may require a few tries to get it suited best for you. As you train with the Bladeflex, you may find as the weeks progress, it may become a bit loose. This is because your posture will be improving and additional adjustments in the size (such as shortening the straps) or in strength (such as increasing the resistance) may be required to take your posture to the next level.

Before you Start
Setting your upper back
Before putting on the Bladeflex, you have to align your body for upcoming changes. This involves two important techniques: setting your upper back position and setting your lower back position. These techniques will help you maximize the Bladeflex posture training experience.
Setting your correct upper body position will determine the Bladeflex size adjustment you require.
Setting your lower back
This lower abdominal strengthening technique will help prevent an anterior hip tilt during training and reduce strain on your lower back. Use this technique while wearing the Bladeflex in a standing or seated position. You may also use this technique throughout the day.
Engage your lowest abdominal muscles by imagining someone is about to punch you just below the belt. This is lower than your navel and between your hip bones. The lowest abdominal muscles can also be engaged by doing a hip trust. This will neutralize your hip position.
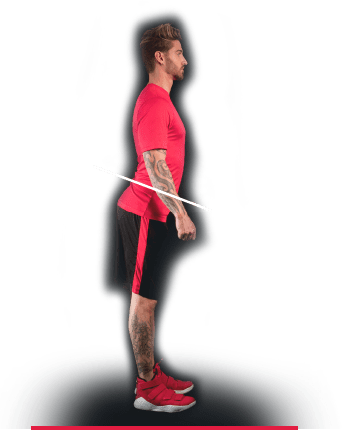
Improper
- Knees are in a locked position.
- Lower abdominals are not engaged.
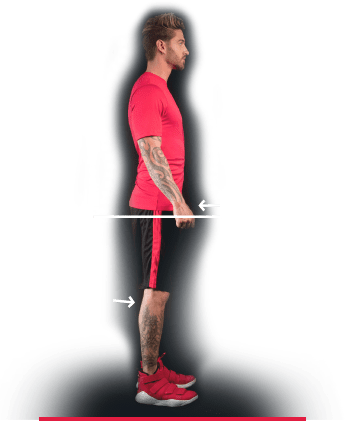
Proper
- Knees are slightly bent.
- Lower abdominal muscles are engaged.
Adjusting the Strength
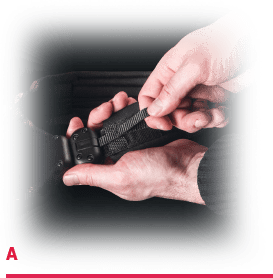
A) (1) While keeping the Bladeflex on a flat and stable surface, hold tightly onto one of the torque clips with one hand and pull out the torque strap from under the elastic strength guides with the other.
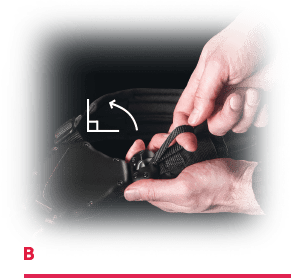
B) (2) With a firm grip, pull straight up on the torque strap, allowing the torque clip lid to open to a 90-degree angle. ! Always hold firm on the torque strap while the torque clip lid is open
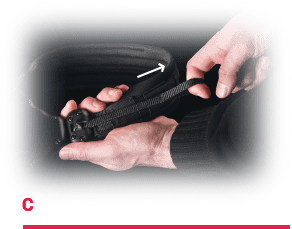
C) (3) Keeping the torque strap level with the padded strap, either pull straight out or allow the torque strap to retract to the desired strength.
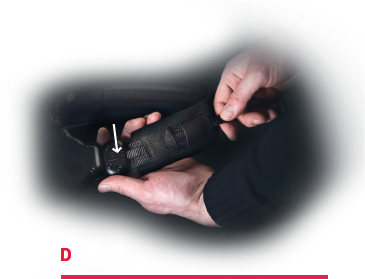
D) (4) Once you have reached the desired strength, use the thumb holding the torque clip to close the lid, locking the resistance in place. (5) Tuck the remaining torque strap under the elastic strength guides.